Tuesday, December 27, 2011

Christmas Elf

 Brownie the Elf is now back at the North Pole resting and I'm sure coming up with more sneaky tricks to play on the kids next December.  The kids woke up to a special note from him on Christmas morning and we haven't seen him since.  Here were some of his last visits.
Still no snow in MN....Brownie must make his own...and snowmen!
 Aaron grew up with this green spoon.  It was left behind from the previous owners when they moved into a new house.  Weird.  For some reason, it became the favorite spoon to have.  We somehow ended up with this spoon and again, for some reason is a favorite in our house.  The kids try to take turns, but let's face it, they fight over it.  This is what they found one morning:
 Then they woke up to this!  Hey, when did Chubbo get hair and a beard??!!!
 And this is a favorite pix of Eliah at 3 months...
 ACK!
 Uh-oh!
 Hmmm, think we found out what happened!
 This was our last morning finding Brownie. 
I'm sure everyone at the North Pole was doing some practice runs on Christmas Eve.  Same was happening here.
 A special thanks to all the Lego guys for helping make a sleigh.
 And since we didn't have real reindeer, only a moose, a little rocket blaster was needed for take off.
 Bye Brownie!  Thanks for all the laughs...see you next year!
XOXO

A Hand Made Christmas

 We went the creative route this year for many of our gifts.  The kids were eager to help make, wrap and label the gifts.  It took about twice as long to get things done with all the "help" but it was worth it.  I love seeing the excitement in their eyes to give a gift that they were a part of.
 The Grandparents both got their own faux-canvas pictures of the kids.  I love the internet....loads of information, ideas and how-to's for being crafty.  These were really fun to make and quite easy!  End result isn't too bad!  They might need a little poster putty or tape in the corners on the back to help keep it level, but otherwise I think it hangs ok. 
 Here's the run down on how to make them.
- Find your favorite photos
- Get the size canvas you want.  I used a pre-stretched canvas 4x4 from JoAnn's.
-Cut your pix just slightly smaller than the size of canvas and Mod Podge to canvas.  Let dry.
-Cut scrapbook or other paper for the edges...again, cut just slightly smaller.  Mod Podge to sides.
-Put on 2 more coats of Mod Podge across photos and edges.  It looks something like this:
 Once you have a couple coats of Mod Podge on, grab your paint.  I used black acrylic, but you could use any color to go with your pix...especially if you kept the pix in color instead of black and white.  
-You could use a paint sponge or paint brush, but I just cut off a section from a kitchen sponge and "sponged" on the paint around the edges.  
-Once paint is dry, one more coat of Mod Podge.
-All that's left is to get ribbon on.  I used a single strand down the back and two at the top to make the ribbon.  Staple gun is needed to get through the wood.
-Tie a bow and you are done!

You may remember a number of weeks ago I did Bubble Painting with the girls one afternoon.  We took all those lovely bubble prints and cut them down to note card size.  Then grabbed some extra envelopes from old Christmas cards we never used and printed more on the back flap of the envelope.  Now you have a set of note cards...tie a bow around them and you are done!  However, when doing this project with 3 year olds, you get finger prints and smudges...so, you would probably only want to give these to someone who won't mind these little "oops'" on their cards.....usually a Grandma.  ;-)
Since Island G&G actually have a tree this year, it seemed fitting to get them some more ornaments.  Home made, of course!
My parents live on an Island, we refer to them as Island G&G.  My in-laws have a huge old house with a fabulous attic that has been turned into an amazing romper room for kids....we call them Attic G&G. 
Anyway, back to the ornament.  Ava and I picked up these little wooden ornaments at JoAnn's not really sure what to do with them.    This is what we came up with:
 Did I mention earlier that I love the internet?  We found map of the Island, shrunk it to size, wrote: We love Island Grandma/Grandpa on them.  Painted the wood red, had the kids write their names (thumb print for Chubbo), and sealed it with a couple coats of Mod Podge.
 We also made some almond bark pretzels, knitted some dish cloths and made some tile coasters...forgot to get pix of those.  So, there's our home made Christmas.  Nothing too fancy but made with love!

Thursday, December 22, 2011

Stocking Stuffer Bags

We're going green!  Check out these little drawstring bags to hold the stocking stuffers instead of using wrapping paper.  They were super easy and fun to make...and reusable!  I picked up some scraps of Christmas fabric at JoAnn's for super cheap and just made them all the same size.  I think they'll be fun to use from year to year.


Sunday, December 18, 2011

Elf traps don't work....

Brownie must have been keeping warm or reading by candle light last night.
Tonight E wanted to try to catch Brownie in a trap...this is what he came up with:

As you probably already know, Elves have a major candy craving, so E baited the trap with a candy cane.  They are hoping that as Brownie crawls under to get the candy, the box will fall off the stand and trap him in the box.  But, I'm sure you have already figured out that Brownie is just a little too fast for that.  The 2nd pix shows a little note that the kids will find in the tripped box in the morning along with the empty candy cane wrapper.  The note simply says: Nice Try - Love, Brownie

In fact, not only was Brownie able to get the candy by rappelling down from the bird cage, get the candy without being trapped, but he also was sneaky like a spy....and don't all spies need a good black mask???
Doh...there he goes with the candy.  Sneaky Elf!

Friday, December 16, 2011

Christmas Tree Sun Catchers

 Today we made Christmas Tree Sun Catchers.  They had a lot of fun doing this one...but I really don't think there is a craft they wouldn't like....especially Dot.  Anyway, we just sort of made this up as we went along as you can make a sun catcher with pretty much any theme.

I cut out a tree for them to trace on their own paper.  They did their own tracing and cutting...both choosing "fancy" scissors for the edges.  Then we mapped out where our crayon shavings would go on the wax paper.  I shaved a few crayon colors earlier in the morning so they wouldn't have to wait around for that.  Once they had their crayon pieces on the wax paper (you really don't need very much) it was ready to iron.  I have an ancient old iron that I use for school projects but your regular home one would be fine, but you MUST put a cloth in between the wax paper and the iron.  The crayons sort of sneaks thru onto the cloth...not on your iron.  Just press down with the iron, don't slide it or it pushes the shavings out of the wax paper.  It takes just seconds to melt the crayon.
We then just trimmed up the wax paper edges and taped to the back of our black paper.  Since Dot is all about the flair, glitter seemed like a must for this project, so out came the glitter glue!  And they chose a colored puff ball for the "star" on the top of the tree.
 Not the greatest arrangement, we just kind of threw them up on the window to see how they would look.  I wanted to get a pix of the girls with their tree....but by the time we got cleaned up, they had moved on to other adventures....making train tracks, playing dress up and building Lego's.  A very fun lesson and I'm sure we'll do them again in blues for snowflakes, pinks for Valentine's day, etc.

Our Christmas Elf, Brownie

The other week we joined The Elf on the Shelf craze and got our very own Christmas Elf, who the kids named Brownie.  It's an adorable story about how each family has an Elf that flies back to the North Pole to report to Santa if kids have been good or bad.  Each night the Elf flies back and ends up in a new spot in the house (provided mom and dad remember to move him), sometimes doing some silly tricks on the kids.  The best rule from the book is that kids can not touch the Elf or he will lose his magical powers to fly (BRILLIANT! as this prevents squabbles from kids playing with him).  I have been having loads of fun doing this and the kids really enjoy looking for him each morning.  Here are some of the places he has ended up in our house.
Since it's been too warm here and no snow, Brownie had to make his own on the kitchen table.
 Doing a little winter camping under the Christmas tree.

 Doesn't a hot bath after camping always feel amazing?!  It must have felt so good to him, being from the North Pole and all, as he found himself here for a couple days.  This happened just at the same time that mom and dad were both not feeling well....strange.
 He made up for it by T.P'ing the house.

 He's pointing to somewhere...trying to blame someone else is my guess....
 Hmmm, the toilet paper roll on the hat kind of gives it away.  E thought this was so funny!
 These are my Grandmother's carolers.  Aren't they sweet.  Love the faces.  Looks like Brownie doesn't want to miss out on the fun.
 Sugar Rush or belly ache?  He cleaned out the candy dish and left all the wrappers.  Dot was NOT pleased with this one!
 Making friends with the "locals" and playing Connect 4 with TinkerBell.
 Found a quiet spot to read a book.
 Must have been missing the North Pole as we found him in the refrigerator next to the milk and whipped cream with a couple cookies from the freezer in hand. 
 But look!  He was prepared with a scarf and earmuffs!
One more week to go and then Brownie will get packed up to go back to the North Pole until next year.  Stay tuned for more Elf adventures!

Saturday, December 10, 2011

Snowmen

 The girls and I made little snowmen pictures on Friday.  They loved gluing on all the puffs.
We used felt for the eyes, nose, arms, scarf and hat.   Pink pipe cleaner for the smile. Gemstones for the buttons...you know, every snowman likes to get a little dressed up every now and then.
 Looking pretty good!
 Q-tips and white paint for snowflakes.

 Finished!

Friday, December 2, 2011

Bubble Painting

 Dot and L had a great time Bubble Painting today.  This was seriously loads of fun because when are you ALLOWED to blow air into a straw to make bubbles???  Certainly not with milk at the dinner table.....but today with paints it was totally okay! 
They loved, loved, LOVED blowing the bubbles!
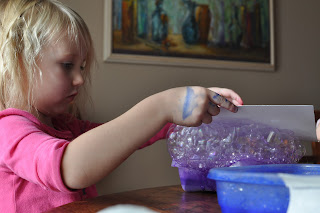
 They blew bubbles then made prints of their bubbles on paper.
I love this pix of L....it really captures the moment.
These two little girls get along so nicely....Dot loves her days with L!
 They overlapped colors and made some really pretty prints!
 I can't show you the rest because we have something special planned....it's a secret!
See Dot's curls?  Her hair was braided last night and she loved her curly hair this morning.
 Bubble Paint Recipe:

Premade bubbles from store or make your own:
3 cups water, 1 cup dish soap and 1/4 cup corn syrup and mix together

Add 1/2 cup Tempera paint to one cup bubble solution, place in shallow dish.  I didn't really measure the tempera paint...just guessed and it came out fine.

Bubble Painting activity found in Family Fun