Tuesday, September 18, 2012

Bath Tub

I did it.  I created my own bathroom toy storage that I originally found here on Pinterest.  When I first saw this, my first thought was: DUH!  IT's BRILLIANT!  And you know what....it truly is.  For 7 years I have dealt with plastic bins, suction cup holders, buckets, etc and it's always a mess. 
Isn't this beautiful?!
 
The one I originally saw had wire baskets and hooks over the shower curtain bar and it looked really nice, but I was trying to use what I had on hand.  Instead of spending money on the baskets, I just used some of the plastic containers that deli meat comes in....we have a ton of them.  I got out the power drill and drilled in two holes at the back, and three at the bottom toward the slant so the water will drain out.  I almost bought some hooks until I remembered we had some zip ties that would do the job just as well.   
 Here they are in action with the little guy.  Another great thing is there is by far less water on the floor outside of the tub as they kids aren't leaning over the side to grab new toys from the bin.  I'm beyond thrilled with this latest little project!

Fall Wreath

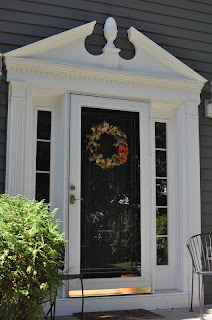
Ok...so this new black door seemed to be screaming at me for a fall wreath.  Hmmm....a wreath.  That sounds like fuddy-duddy kind of stuff.  I've never put anything on our door except for the Christmas wreaths that I buy from the Boy Scouts each year...and those I don't really even like.  Anyway, I suddenly have this crazy urge to decorate our door with season appropriate bling.  So, here is one idea...I made it using a bunch of strips of upholstery fabric all tied together.  

Still not sure how I feel about wreaths on doors....I think I'm afraid it will turn into all the ugly flower decor from the 80's and 90's.  But Ava and I brainstormed some ideas for a Halloween wreath....uh-oh...see, this is how it all gets started.

Saturday, September 15, 2012

Baby Blanket

I made this baby blanket for a very special little person-to-be and got to give 
it to her mom today.  
The pattern is the Elven Pixie Blanket and it was a great knit....not terribly difficult, yet interesting enough that it didn't get boring.  It had two options for the border and I chose to do the more delicate picot edge which means a bit of crocheting too....something I haven't had much experience with, but it was fun and turned out just fine.

 I used Amy Butler's Belle Organic dk in the color Chocolate - 50% Cotton and 50% Wool.  
Soft, squishy and cozy...just the way a baby blanket should be.  


Monday, September 10, 2012

Donuts and Dough

The other week I tried out my mini-donut pan for the first time!  The are baked, not fried and very yummy.  I will be trying some pumpkin spice ones soon, but you can check out the regular recipe I used here.  I used a simple cinnamon and sugar mix for the coating - yum!
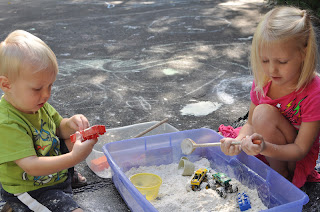
 Today we made Cloud Dough - to play in, not eat.  We used about 8 cups of flour and 1 1/4 cup vegetable oil.  You can use baby oil as I have done in the past but with Nikkels I thought the veggie oil would be better.
 It was such a lovely day we decided to do this outside on the driveway so we wouldn't have to be worried about making a mess.
 And that's a good thing since my tarp I put down under the kids turned out to be pointless, the navy blue shorts Nikkels was wearing eventually looked gray....
 And this is what the dog looks like after licking/snorting loads of flour - I think he's in the middle of a sneeze here.
They had loads of fun...they made tire tracks, snow mounds, hand/foot prints.  We got out the little toy kitchen and they had fun pretending to make food at their restaurant...the possibilities are endless.  If you aren't afraid of a little mess...this is a must with little people.

Sunday, September 2, 2012

Black and White

See that front door?  Pretty white and blah, don't you think?
 There, that's better....a nice, dark midnight black.  Love it!
Here's what it looks like from the inside.  We also changed out the door hardware...we kind of got the impression that our sellers had given out a house key or two to friends and family over the years.  But, I suppose we didn't really need to since we have this ferocious watch dog....uh-huh...right.  Change the locks.
 Yesterday when we were painting the garage cabinets we brought up my old art table from college to paint also.  It's a great table made from 2x4's and the top is made from a solid wood door.  I wish I had taken a "before" picture...but it was all plain old lumber, so I'm sure you can imagine.  Somehow it made it's way to my in-laws basement years ago and I had no idea it was there until this summer.  Fast forward to moving in and we realized it would fit PERFECTLY in the nook for my art area. 
 I mean REALLY!  Is that perfect, or what?  It's like it was made for that table!
 I'm so happy with how my art area turned out.  For years I've had my stuff jammed into closets and bins and stashed throughout the house.  Now, it's finally all in one space.  The shelves are the Expedit shelves from Ikea.  They aren't organized the way I want them yet, and I have some other ideas for finishing the space, but you get the idea.
 And here are some of my favorites....this is a picture (that needs a much better frame) of my Great Grandmother knitting.  I love this picture.  And if you look at the picture above, that's my Grandpa's easel. It's very old and covered in paint splashes.  I put one of his paintings that is waiting for a new frame on it.  Just makes me happy and inspired.
 And if you are wondering..... that's a shower curtain behind the shelves!  It was an extra fabric one we didn't need anymore and it turns out it fits perfectly....we just duct taped it to the top and didn't need to trim anything. It's not exactly the pattern I had in mind, but it will do the trick until I find my dream fabric...or shower curtain.  ;-)

Saturday, September 1, 2012

Garage cabinets

These three lovely cabinets were in the garage when we moved in.
 However, they originally were up there on the wall above the pegboard...forgot to take the "before" picture. They are great cabinets, but they were horribly placed as they were WAY too high.
 So, we asked around for some help and this little guy volunteered to help prep the wall.
Once we got them up on the other side of the garage we threw on some primer and paint and now we have a stack of cabinets that are MUCH easier to reach.  Since we don't have a ton of closet space coming in off the garage, we are thinking this will be a good way to have a cubbie system...good for storing hats, mittens, extra winter wear, etc.  Room below for boots and such.  VERY exciting!
And just because....

Sunday, August 26, 2012

Baby Shower Invites

So I have to share these baby shower invites I made for my very dearest friend.  They were so fun to make!  The little flaps tuck under the slot for the ribbon so you just open flaps and info for the party is printed and glued to the inside.  I found those little sticker safety pins and added the ribbon.  I also used double sided paper so there were different designs from front to back.  I loved how different each one was!  If you want the template to make your own you can find the link here.