Monday, November 21, 2011

Flubber

 Saturday afternoon we made Flubber.  What a wonderful time making this mess of ooey-gooey-ness.  The kids loved it...in case you couldn't tell from their faces.  I'll post the recipe for Flubber below.
Dot made hers pink, E made his orange.


 We learned something tho....you have to take it out of the liquid mixture once it sets up a bit or else it will turn into one major mess of slime that simply won't form anymore. 
A nice little science experiment.
 Yup, we had to do a 2nd batch as our first turned to mush from being played with too much.
 That's better!   Flubber in bouncy, bending form.  You can even roll it in balls and they sort of turn super ball like.
 Just keep it in a ziplock baggie and your flubber will last for quite some time!
Flubber Recipe:
4 oz Elmers School Glue
4 oz water
1/2 tsp Borax
1/2 cup water
Food coloring (if you want a color)

Mix glue and equal amount of water in one bowl...add color if you wish
In 2nd bowl mix your 1/2 cup water (warmish) with Borax
Slowly mix the two together and you get flubber.
Have fun!

Thursday, November 17, 2011

Gobble Gobble

 Dot and I are really having fun with Thanksgiving kind of crafts....here's another turkey!
Painted cardboard roll....
Hand prints for feathers...
 A little glue, google eyes, feet....
 It can't stop there....
 There..that's better....no turkey is complete without eyelashes, beads and a crown.  
Yup...that's one pretty birdy!

Wednesday, November 16, 2011

Bingo on the Farm

 Dot and I did some Thanksgiving activities today.....letter recognition from Thanksgiving type objects.  Then a little Thanksgiving Bingo...this was a huge hit!
Then we moved on to playing with the farm animals, but then she wanted to draw...so, we drew a farm!  I love her barn with the chicken in the hay loft...how cute is that?  And those are clouds...it was a very cloudy day she said.
 
 It was a very crowded farm.  But we had fun...and I think all the animals did too.  ;-)

Tuesday, November 15, 2011

PlayDoh Alphabet

Dot and I made another batch of that PlayDoh yesterday.  This time we tried using the KoolAid for coloring.  Hmmm, I am not a fan and will return to food coloring.  The KoolAid is SO sweet smelling and not in a good way.  Plus, Dot has to have many reminders not to eat the playdoh to begin with....now you add something that smells like grape bubble gum...yuck.

Anyway, today we were working on the alphabet and instead of writing them, why not make the alphabet in playdoh??!!!  She loved this and it was fun to watch her figure out how to make all the letters this way...I think she did a pretty good job!
Check out E's art from school.  It's a first grade lesson on Piet Mondrian's Broadway Boogie-Woogie. See that pile of squares and rectangles?  That's a junk yard....love it!

Sunday, November 13, 2011

Envelope Pillow Info

So I realize I didn't give any info about how I made my pillow covers.  For a lot of you it may seem like a complete no brainer, but I do now sew.  I've made a few things like curtains, crib skirt, baby quilt...but they are all rather basic and the entire time I'm making it I feel on the edge like this could turn out really cool....or a complete disaster.  So, I'm learning.  I also have made statements that I hate to sew....this is actually not true.  I really enjoy making things...but I have no space to do it....I lug up my sewing machine from storage up to the kitchen table along with all the other things that are needed and I need to time this for when curious little hands are not around to "help".  It's kind of pain.  My dream is to have a craft room someday where I can leave a sewing machine table out and have a place for all my yarn, patterns, fabrics, etc.  ANYWAY, before starting last night I watched this 8 min video on making an envelope pillow cover.  She's clear, it's simple...yup...I can do this. 
Things that I've learned...my pillows were 18X18 so larger than hers.  I added a little more length for the overlap in back...but it wasn't quite enough.  The overlap tends to pucker and not lay as flat as I had hoped.  But I think I can easily fix that by putting in a little snap just to keep it in place a little more.  I even found snaps in my stash!  Perfect!
I also now wish I had gone with an even more bold bright design for the green ones.  They are nice, but it lacks something from a distance.  I love the floral design.  Best thing....I bought the fabric for $7 and change at Joann's....like the green, not in love...works for now but if I feel like changing it again...I'm only out about $4!  How cool is that?
I also would like to learn how to do piping.  I found this tutorial that makes it seem doable.  I really think I'll try this on my next try...it's all baby steps...right? 
Anyway, here's another pix of those finished pillows.  Louie seems to like them!


Saturday, November 12, 2011

Saturday night? Sew what?

I'm not sure about you, but my tastes have changed when it comes to decorating.  I am beyond done with my house.  Don't get me wrong, it's my home and I love my home, but you know...I'm tired of brown.  My whole house is BROWN.  Cherry furniture, brown couch, tan walls, burgundy/wine drapes and walls, brown towels.....it's beyond boring.  I haven't really been happy with it for a long time and it started 8 years ago when we bought the home and had to furnish/decorate it.  We were on budget extreme so I went with what was affordable and safe....safe basically translates to boring.  So, I've been sorting pictures of home decorating and noting the rooms and colors that I'm drawn to and make me happy....turns out what I am attracted to is NOTHING I have in my house.  For those of you who know me, hold on to your seats, because I just realized I'm drawn to COLOR!  Gasp!  I know.....now, don't start thinking me all crazy or anything.....it doesn't mean I plan on wearing color...I think I just want to live in color.  So, today I decided to start small and make some new pillow covers for our couch pillows.  Dot and I went to Joann's and picked up these two lovelies.  I started when the kids went to bed and a little over 2 hours later I had them all done!  What fun!  It's a Saturday night...I made pillow covers....what did you do?

A little wine always helps with any crafty project.
Colors make me happy!

Thursday, November 10, 2011

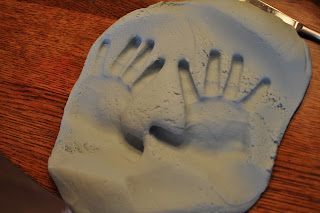
Best Playdoh...Ever

Dot and I went to her ECFE class this morning.  It's just a family play time but we call it preschool.  She LOVES to go to school.  They have arts and crafts, free play and then circle time with songs and such.  They even had parachute time today...what a blast that was!  Anyway, they had a playdoh station today with the most amazing playdoh I have ever worked with....so, how do they make it?  I was sent home with the recipe!  Hooray!  We made it right when we got home....however, I was short on salt so I had to fudge the recipe a bit, but it still worked.  I love when the kids are so ready to help.

Helping poor the water.
She only wanted light purple so a couple drops of red and blue.
Wearing her Tinkerbell apron and mixing.
Finally it's ready!  One gigantic ball of lavender playdoh!


Here's the recipe for Saturday PlayDough

Bring 2 cups water to a boil, while waiting mix:
2- Cups Flour
1 - Cup Salt
4 - tsp Cream of Tarter
Mix these dry ingredients then add:
2 - Tbls. vegetable oil
4 - Tbls lotion

When water comes to a boil add food coloring or a kool-aid packet for color and scent. Pour liquid into mixture and stir well.  Let dough cool and thicken, then knead.

What makes this playdough so great is the hand lotion.  It makes an amazing difference in how the dough feels and rolls out.  This recipe is also not crumbly.  One thing I can't stand are all those little dried out playdoh bits everywhere...this one stays soft and smooth and doesn't crumble apart.  Next time I'll use Kool-Aid...just not something I typically have on hand.  Wrap up in plastic wrap or a plastic bag and store in the fridge...it lasts longer that way.  Have fun!

Wednesday, November 9, 2011

Paint in a Bag turns Turkey

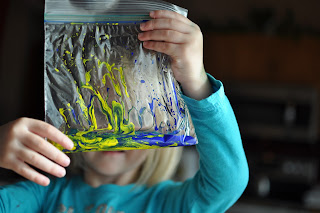
 So we tried Paint in a Bag with baby oil and Tempera Paint yesterday.  It was fun to watch our two color choices swirl around until they finally ended up mixing together and creating a new color.  It was a fun lesson on color mixing.  We just used the sandwich bag size and that was big enough for how much interest she had in the whole thing.  Dot kept asking what we were going to make, when the real project will start...etc.  Good for a sensory experiment, but she wanted to REALLY make something!


She really liked to watch the colors ooze their way down the bag.
 So, hmmm, what to do with all this paint in baggies.  Well, we dumped it all out in cups and decided to paint some coffee filters.  At this time, I really had NO idea where we were going to go with this.  The girl just loves to paint.  Anything.
So we let our coffee filters dry overnight and decided this morning to make our coffee filters into feathers for a turkey!  Perfect...now this is Dot's kind of activity. We cut out a body for our turkey.
Cut out circles for eyes and she made her own beak and gobbler.  Added a little color....pink...
  
...and orange.
 
We used our funny scissors to cut out different edged feathers from the filters and glued them to the back of our turkey with glue sticks.

 The sun was shining so bright at this moment that you really can't see the colors properly.  I didn't bother checking the photo once I took it, but you get the idea.  But there you have it!  Paint in a Bag turns into a Turkey! 

Monday, November 7, 2011

Thanksgiving Tree

We've had Christmas Trees, but never before a Thanksgiving Tree and I'm loving it.  Each night at dinner each family member shares something that they are thankful for, writes it on a tag and hangs it on our tree.  We will continue to do this through Thanksgiving and eventually I'll make a list of all the things our family is thankful for and will post here.  It's great fun for my 3 and 6 year old. My favorite so far has come from my 3 year old....she is thankful for her teeth.  Love it!
What are you thankful for?